
Tips & Tricks: Using a Template to Design Your Glass Art Creation
In this edition of Tips & Tricks, we are going to cover how to use a template on one of our most popular projects, the soap dish. The soap dish project at I Made It! Glass Creations, can be decorated in a variety of ways. First, we must decide if we would like to make our soap dish on a white, black or clear piece of canvas glass. In this example, I have chosen to create on a clear canvas. I enjoy using clear canvas glass because it can be seen through, allowing us to decorate both the front and back of our project and giving us the option to create a background and foreground to our design. White and black are both beautiful additional options, but for this example, let’s use clear.
This tutorial may be a little advanced for young customers or first timers, but never fear, our staff is happy to help you with every step along the way - no experience necessary. These instructions are meant to be a more in-depth look at our creative process and to inspire and challenge all of our inner artists.
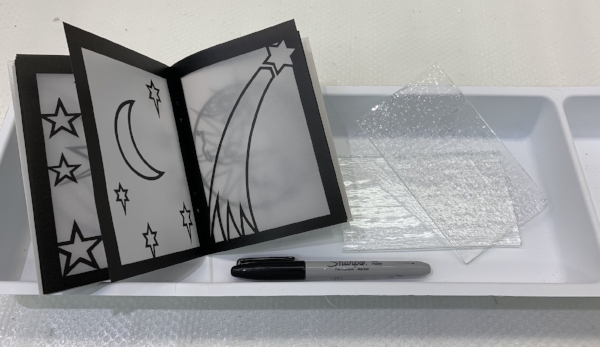
Here you can see, I have chosen my template design and my glass. We have lots of template booklets for you to look through, or we would be happy to help you create your own design - abstract designs are always welcome too!
The soap dish project, as you can see above, requires two slices of canvas glass, a “Top” piece and a “Bottom” piece which you will see in future pictures denoted with a T or a B. This project requires two pieces to make the finished project the right size. If you would like to know more about the science behind this, ask one of our staff members!
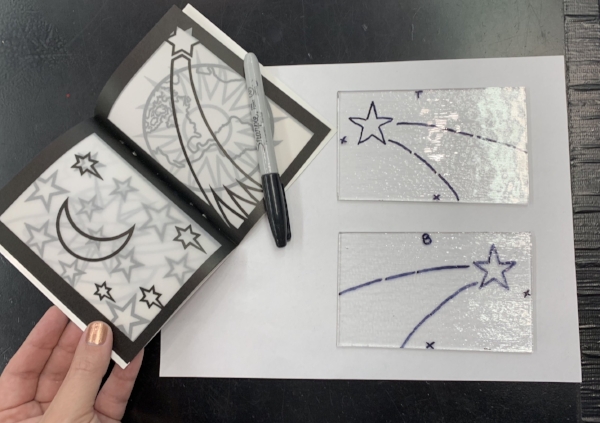
There we go. Now I have traced my design by placing the glass over the template booklet and outlined my design in Sharpie marker. Sharpie marker is a big help around the studio as its ink will burn off in the kiln leaving only your beautiful colors (in the right places ;) ).
Take a closer look at this photo. You will notice I have marked my Top layer with a T and my Bottom layer with a B. I also added little ‘X’ marks the spots and my traced layers are a mirror image of each other. This is very important: because we DO NOT sandwich glass between canvas layers, I will decorate my layers as mirror images because my BOTTOM layer will get FLIPPED before firing and the Xs will align. This is why tracing a template before decorating can be very, very helpful when designing your glass artwork. Now all I have to do is decorate my clear glass accordingly.
If it helps you remember, you will be decorating one “shiny side” which is your Top piece and one “bumpy side” which is your Bottom piece. Ask an employee to show you the difference!

I begin by decorating my Bottom layer, denoted with a B, which will become the background of my design. It is a good idea to design your background first because it will probably be the side with more glass and glue on it and it will need a little bit of time to dry while you’re working on your other layer.
You may see here that I am using the thinnest type of glass at the studio called confetti. I am layering the confetti in sort of a decoupage or overlapping style to achieve the darkness and coverage I am looking for. I am sticking the pieces of glass down with as little glue as possible to make them stick - just a teeny dab of blue Elmer’s gel glue on my toothpick. Too much glue can cause hazing and white marks on our projects, which is not a desirable effect, so it is important to try to use as little glue as we can.

My background, or Bottom layer, is finished! Let’s put it aside and work on my Top layer.

To create a background and foreground effect, I am now going to outline my design and add my colorful flair to the Top layer of glass. I have chosen to use a type of glass called stringer, which is great for outlining designs, writing names or slogans, and even for signing the date to your projects. You can find stringer glass in all sorts of colors, available in our studio right in our colorful mix glass trays. Stringer glass can even be bent using a small open flame or candle but that’s a tutorial for another day….
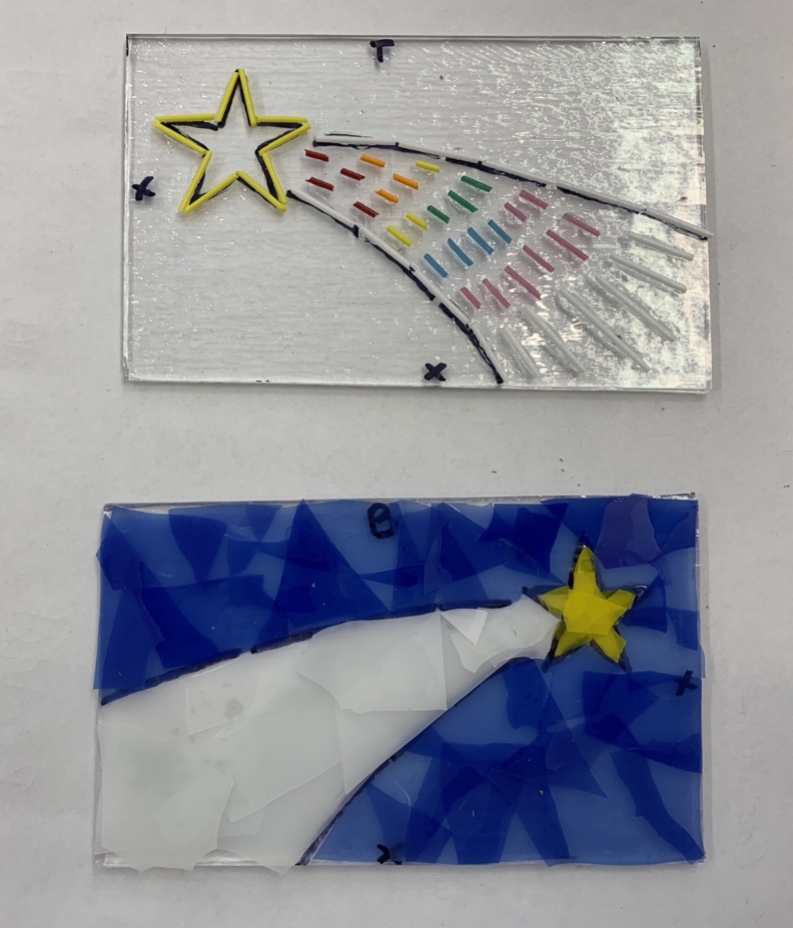
Top and Bottom layers all decorated! And since my Bottom layer has had time to dry, it is time to flip that layer and align my Xs.
My layers are stacked correctly and they are ready for the kiln, where they will be heated up to nearly 1500 degrees and fused together creating one solid, shiny piece of beautiful fused glass art. At this point, we will ask our customers to give us a five day waiting period while we cook, process and mount your project. Return to pick up your artwork within 90 days of the pick-up date on your receipt and receive 20% off anything you make on the day you decide to pick your projects up called our Stay & Play Program.
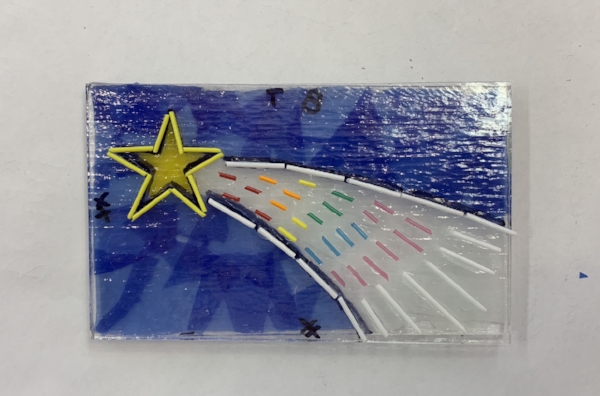
Let’s see how it turned out….

One solid and vibrant piece of fused glass art.
But wait…. it will require one more firing to transform my soap dish from a flat piece of art into its dishy shape. This firing is called a Slump firing. We will cook the glass in the kiln a second time but at a lower temperature to simply soften the glass into a mold that will be placed below. Different glass artworks can require what are called different firing Schedules. It’s just another part of the recipe when you are cooking glass artwork!
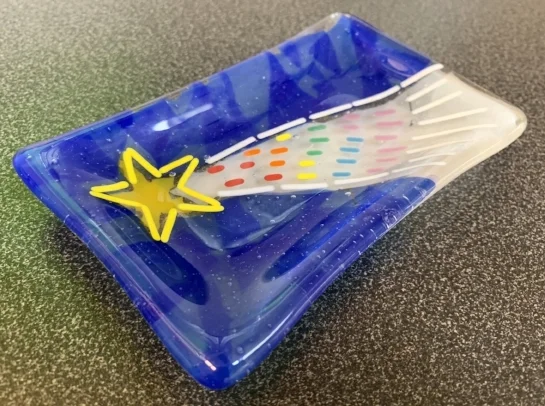
All finished and ready to go home with you!
I hope you enjoyed this tutorial. If you have any questions at all, please feel free to ask one of our wonderful staff members, they are full of helpful answers and even more Tips & Tricks!
See you around the studio!